![alice [UNBLOCKED]](http://2.bp.blogspot.com/-3V3GC4_4dJQ/USLDM6nujpI/AAAAAAAAA_c/xo_HnxdIkyI/s1600/alice%2Bunblocked%2Blogo.jpg)

 After my Contigo travel mug pulled a vanishing act somewhere in the middle of hospital rounds, the search began for a suitable replacement. My criteria were simple: aesthetically pleasing, easy to clean, and successfully keeps a caffeinated beverage hot all day. Enter the Zojirushi SM-KA48PT. At sixteen ounces, it promised a pint's worth of caffeinated goodness at a temperature that could keep me toasty warm in the middle of a chilly pharmacy. Let's see how it held up:
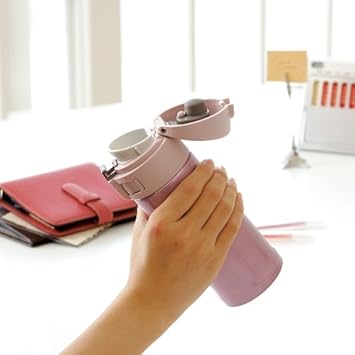
 Aesthetically pleasing Okay, so the mug is a little more girly (and slightly sparkly) than I would have preferred, Still, it's a fun color, and there are always other options. The mug comes in lavender, which I purchased, as well as champagne gold (not shown), pink champagne (not shown),
smoky blue, and yes, even black.
Aesthetically pleasing Okay, so the mug is a little more girly (and slightly sparkly) than I would have preferred, Still, it's a fun color, and there are always other options. The mug comes in lavender, which I purchased, as well as champagne gold (not shown), pink champagne (not shown),
smoky blue, and yes, even black.

 Easy to clean The beauty of the SM-KA48PT is that it is easy to disassemble for cleaning. Unlike the Contigo travel mug, its sealing mechanism comes apart so that I can make sure all working parts are clean. Unfortunately, the mouthpiece has a tendency to collect tea stains. I usually just go at it with a Dobie all purpose pad, and I have a sneaking suspicion that a thorough cleaning would require a toothbrush and possibly a pipe cleaner.

 Temperature control This last point was the nail in the coffin for the Contigo mug. By the middle of an eight and a half hour shift, the drink was usually lukewarm at best, with the distinct taste of milk that was starting to go bad. Blech. In contrast, the SM-KA48PT keeps the temperature up for a full workday and then some. During my test run, the water started at 208°F (97.8°C), at least according to my water dispenser. After filling the mug and assembling the lid, the temperature was 193°F (89.4°C). Approximately 5.6 hours later (reading not shown), it had dropped to 156°F (68.9°F). At exactly twelve hours from the first thermometer reading, the temperature had only fallen to 134°F (56.7°C). For those of you who don't care about numbers, it was almost too hot to drink. In other words, the mug far exceeded my expectations. No more borderline spoiled beverages for me!
The Zojirushi SM-KA48PT isn't a perfect item. Disregarding the pinkish sparkles and all relevant connotations, however, it does more than a respectable job as an insulated travel mug. I actually have to make my tea early and let it sit in an uncovered mug for half an hour before screwing on the lid to avoid scalding my mouth with the first sip. Usually, I hurriedly cap it and toss it into a side bag, where it is jostled to high heaven as I race to clock in on time. One commute later? Zero spillage. My workdays have just gotten that much better. Really.


